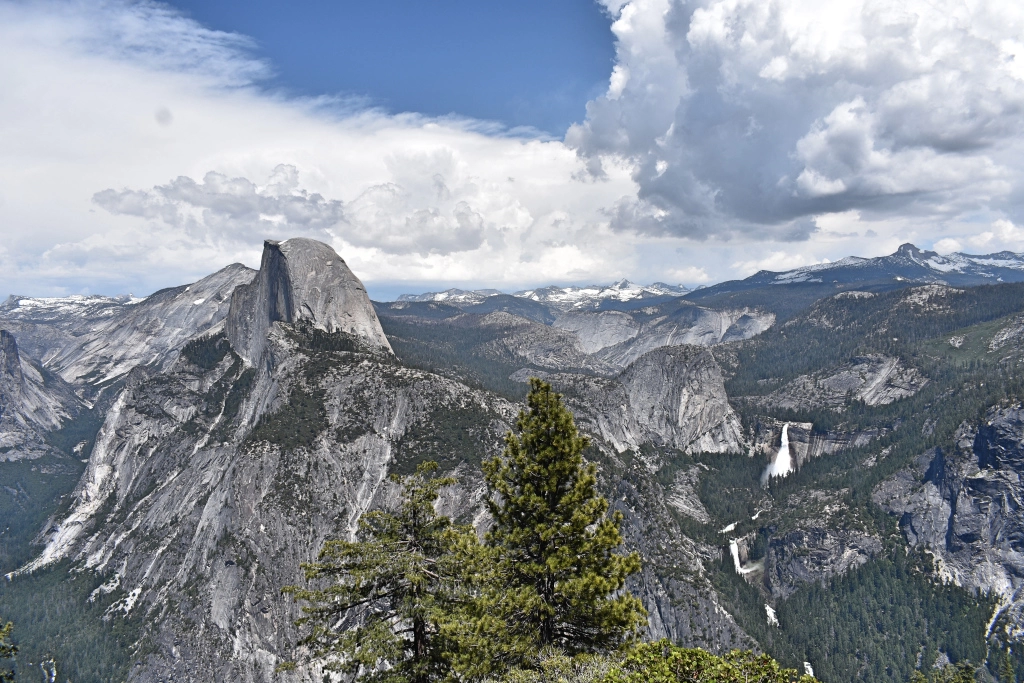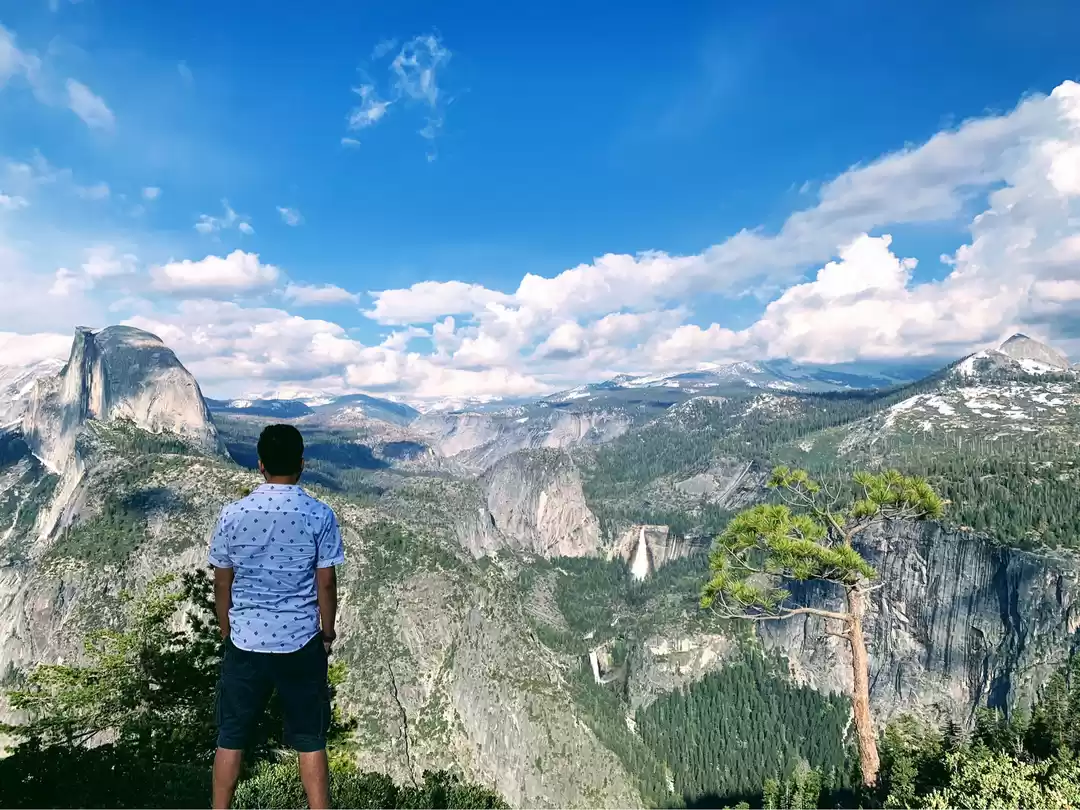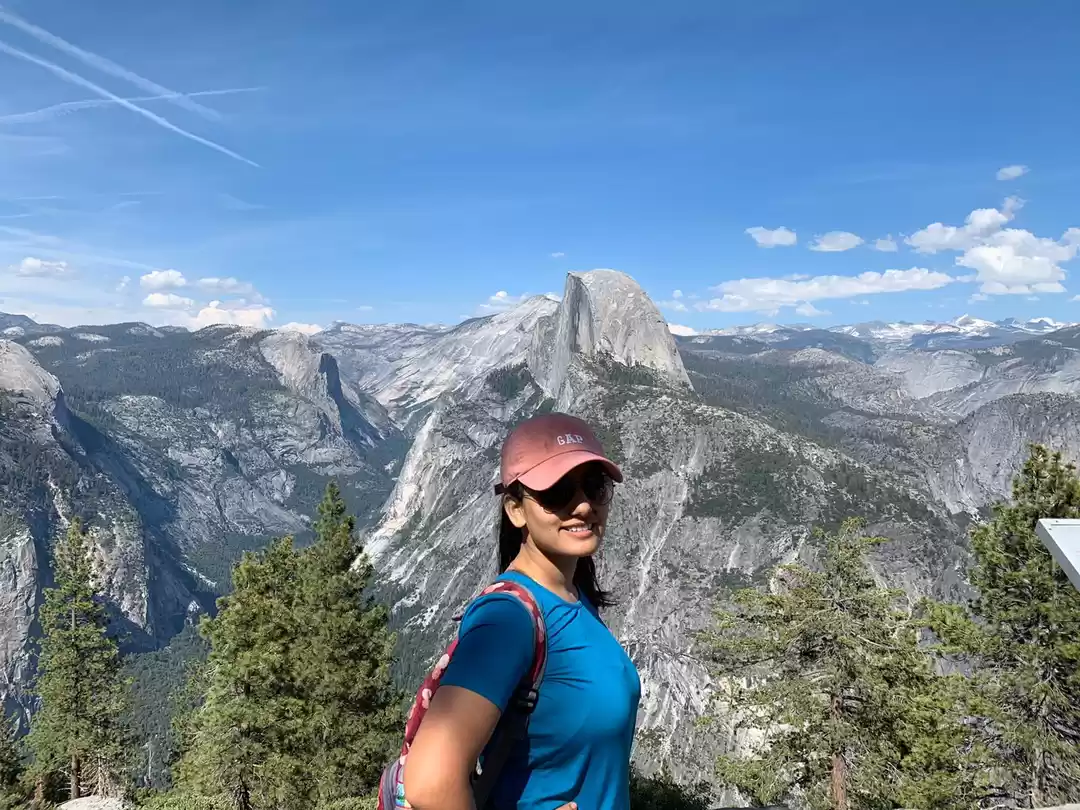
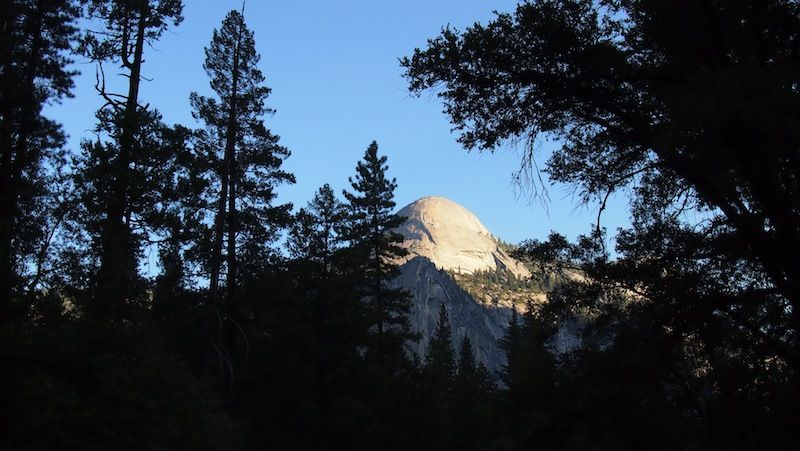
We hadn't planned on hiking Half Dome but when I saw it with my own eyes, rising 5,000 feet above the Yosemite Valley, I thought, I have to go up there! When I enquired about permits at the visitors center the ranger told me I could enter the daily lottery. The daily lottery had an application period of two days and lottery results would be announced a day in advance. Brian and I were booked for five days at Yosemite’s Crane Flats campground. We had the time so we put our names in the lottery.
We crossed our fingers and hoped we’d get the permits. And we did!
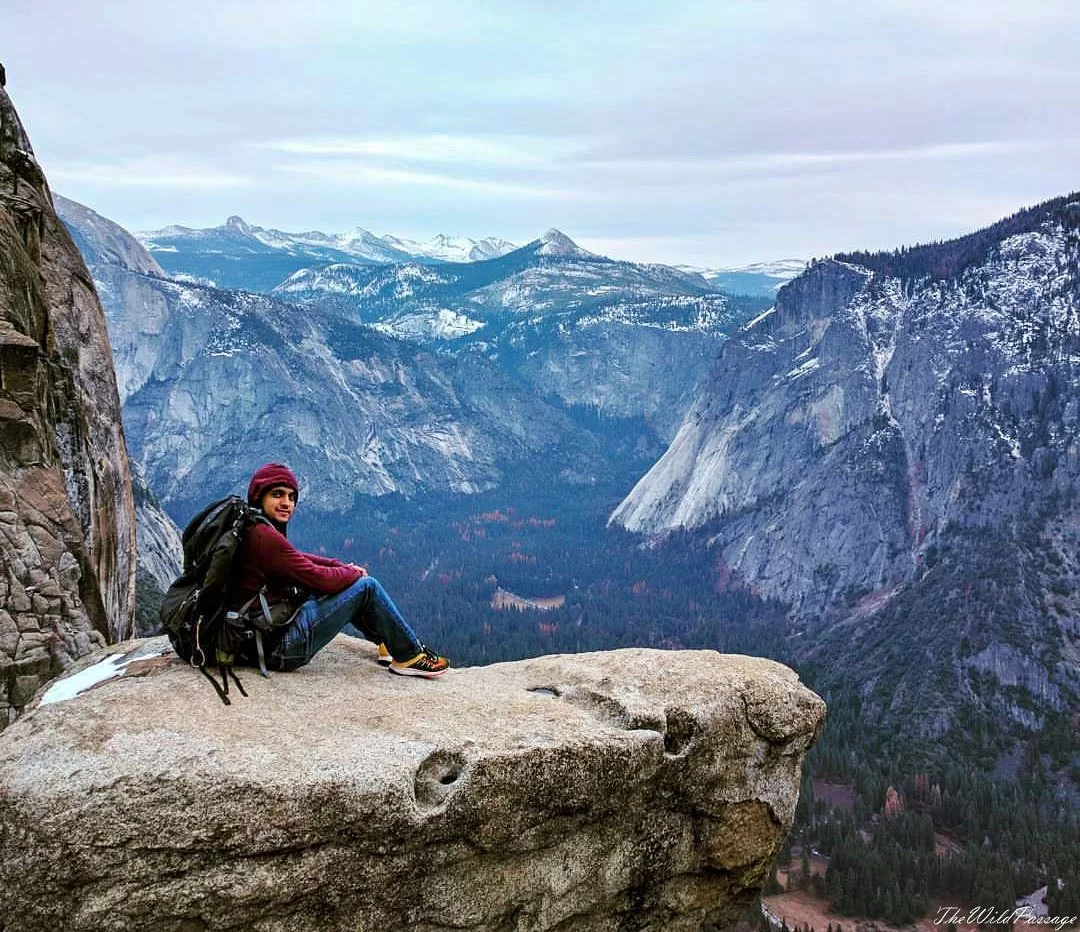
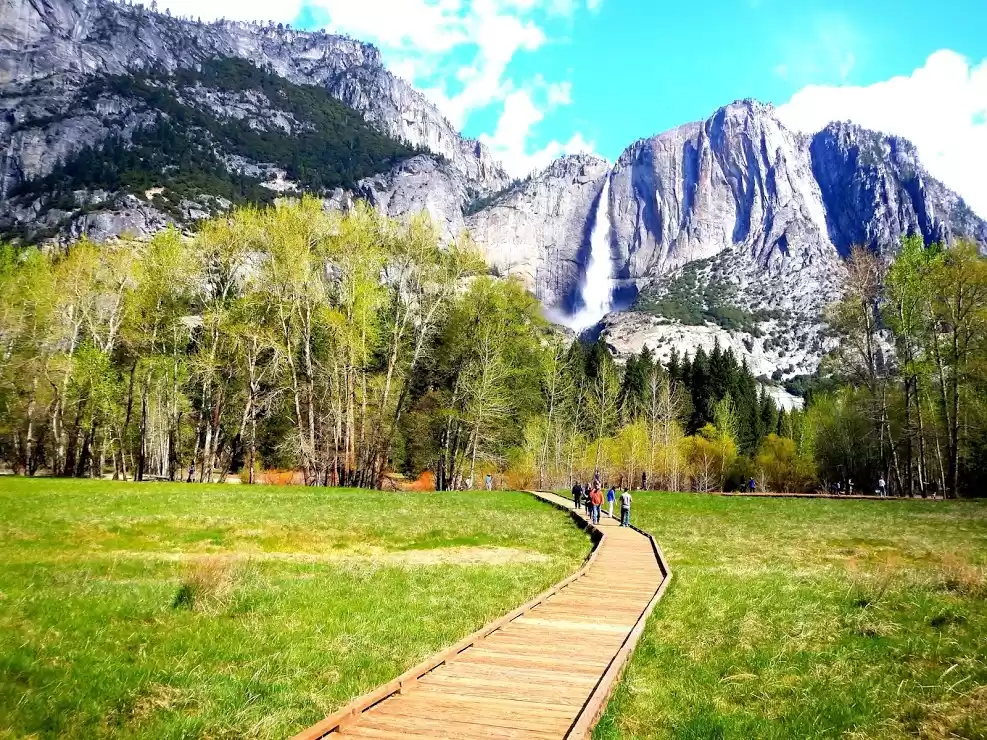
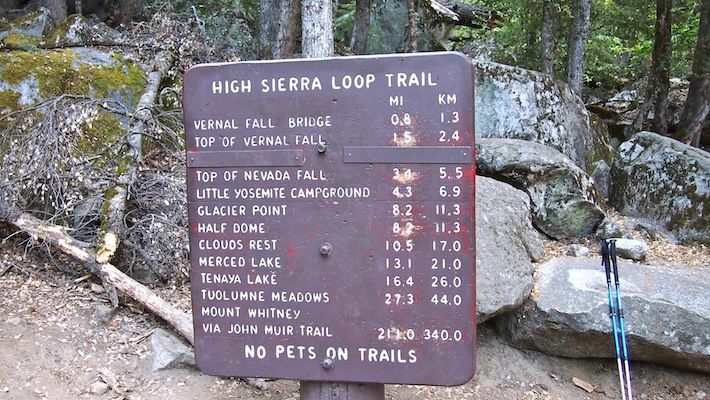
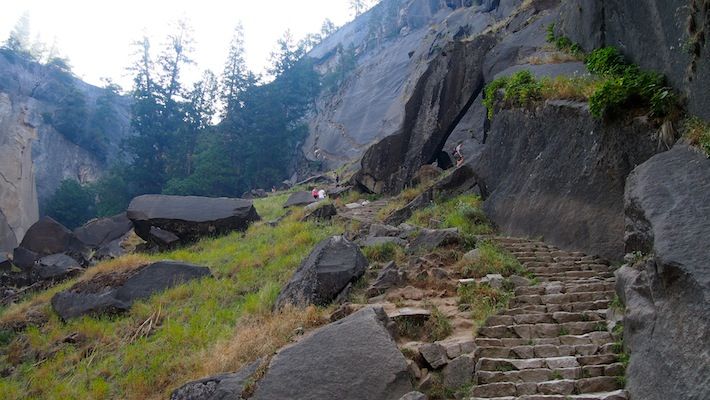
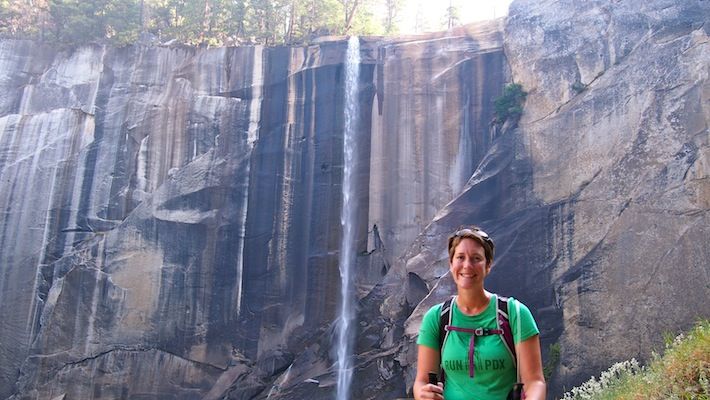
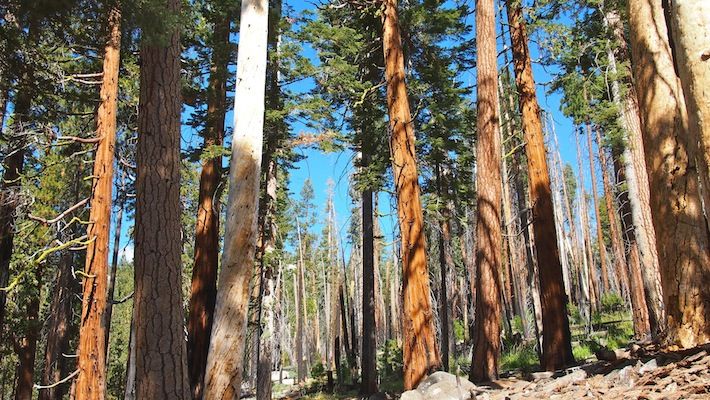
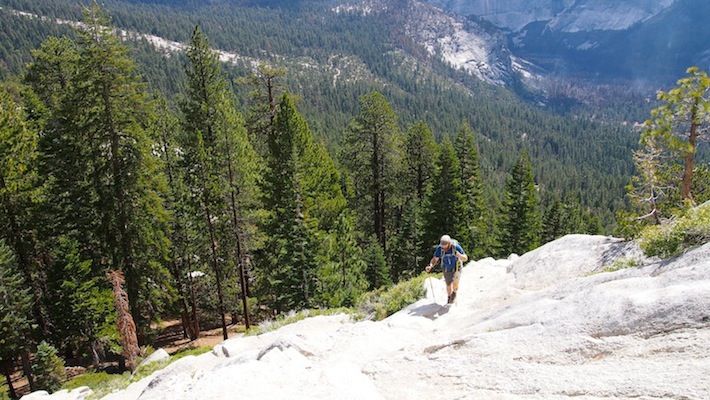
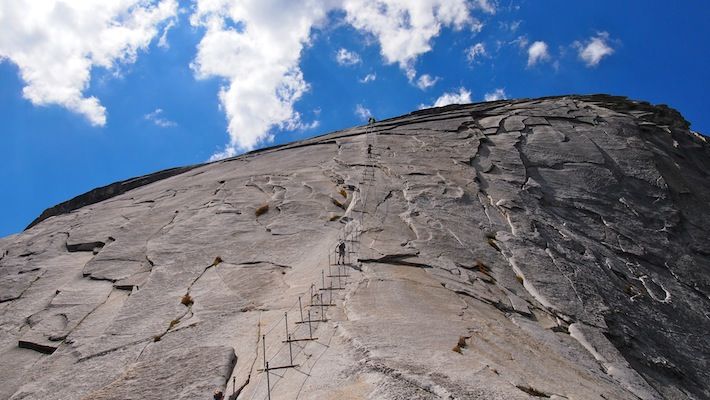
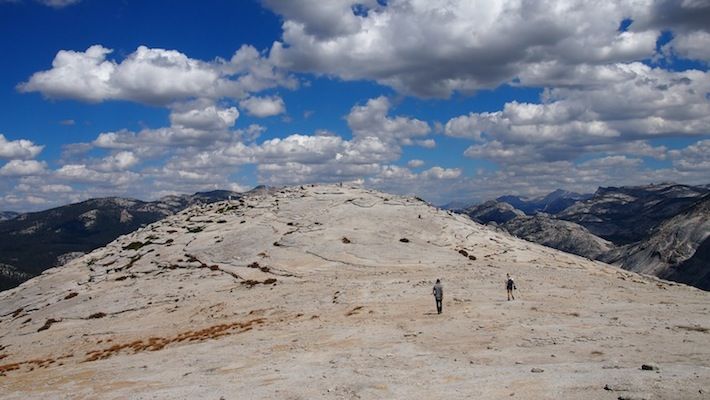
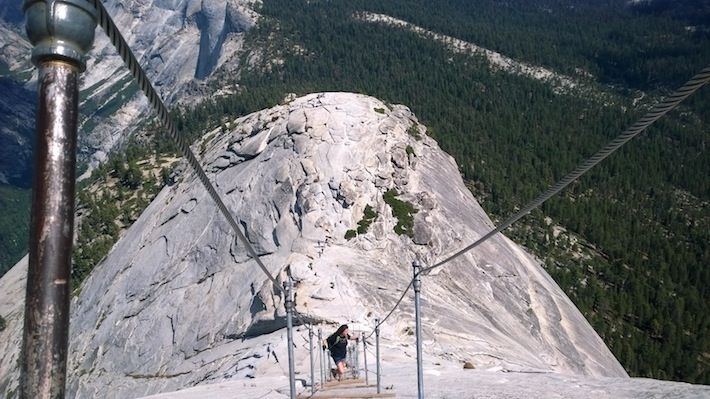
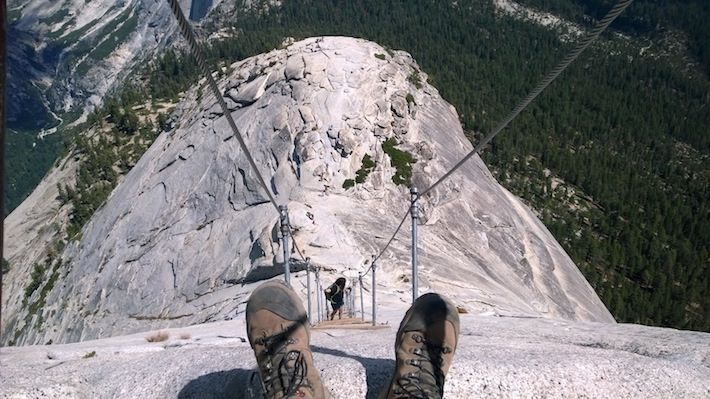
The trail begins at the Happy Isles parking area in Yosemite Valley. There’s two routes up to Half Dome, The Mist Trail and the John Muir Trail. We chose the Mist Trail which is shorter but much more intense. The Mist Trail climbs past both Vernal Falls and Nevada Falls via a long stretch of steep, rocky stairs. The Mist Trail reconnects with the John Muir Trail at the top of Nevada Falls and, happily, the trail evens out for a bit and winds steadily up through beautiful forest. Eventually, though, the trail begins to climb steeply up to the base of Half Dome. The final push up Half Dome is not for the faint of heart. Two metal cables help hikers ascend the last 400 feet to the summit. The Park Services says that “since 1919 relatively few people have fallen and died on the cables.” Here’s a tip. Don’t think about that sentence when you’re halfway up the cables. It’s a tough climb but the views at the top are worth it.
Climbing down was the part that worried me the most. But I went down backwards so that I was facing the rock face and that made the descent relatively easy, much easier than I’d imagined. Hiking Half Dome was hard and wonderful. I think it’s a perfect hike to add on your adventure bucket list. Read on for my tips on hiking Half Dome. There’s some important stuff in there so make sure to read carefully (especially the advice on the gloves and water!).
Tips for hiking Half Dome
Permits
Permits to hike to the top of half dome are required at all times. The National Park Service holds two sets of permit lotteries. The preseason lottery period occurs March 1- March 31 and results are announced in early April. 225 permits are awarded each day in the preseason lottery. Additionally, the National Park Service holds a daily lottery that allows for more spontaneous trip planning (this is the lottery we entered). This lottery awards approximately 50 permits per day and must be entered two days in advance. There’s a nominal fee of $6.50 to enter the lottery by phone ($4.50 online) and $8 per person if you are awarded the permit. To apply for a permit, visit Recreation.gov or call 877-444-6777 (call center is open from 7 am to 9 pm Pacific time; online requests can be made any time during a lottery period).
Bring your ID
Bring a printed copy of your permit and your ID. Park rangers check for Half Dome permits before allowing hikers into the cable area.
Bring gloves
You’ll need a pair of gloves to help with your ascent and descent of the Half Dome cables. We didn’t bring gloves and it was a huge mistake. Luckily, thoughtful hikers who came before us left a pile of gloves at the bottom of the cable area. If they hadn’t I’m not sure we could have completed the final push to the top. You don’t need fancy climbing gloves, kitchen or gardening gloves like this will do, but make sure you have them. Otherwise the friction with the cables while climbing up and down will tear at your hands.
Bring trekking poles
The hike up Half Dome is 4,800 feet straight up and then 4.800 feet straight down again. Even if you have bionic knees you’ll be in pain. Trekking poles will make a world of difference and help out immensely, especially on the downhill portion.
About the cables
The cables are scary. I didn’t look down because the drop was impossibly far. It’s hard work hauling your body up that rock face. Go slowly, breathe deeply and do not attempt to go up or down the cabled portion of the hike if it is raining or looks like it is going to rain. People die up there, primarily from slipping when the rock is wet or from lightening strikes. I saw two people wearing harnesses and clipped in with carabineers. They were moving slowly and caused quite the backup on the cables. That said, it’s better to be safe than sorry so do whatever makes you comfortable. From what a witnessed very few people clip in.
Carry plenty of water or bring a water filter
It is a long (16+ miles), hard (4,800 feet up and then back down again) and hot hike. Brian and I brought 3 liters of water each and had to filter more drinking water on the way back down (in total we drank 5 liters each). Make sure to carry plenty of water or bring a water filter so that you can stay hydrated (here is the water filter I recommend because it is cheap ($25.00) and easy to use).
Sunscreen
Wear sunscreen and reapply often. Much of the hike is exposed and the sun at the top of Half Dome (8,800 feet in the air) is intense.
Take the John Muir Trail Down
On the way up to Half Dome you can choose between taking the Mist Trail or the John Muir Trail. We chose the Mist Trail up because it’s a mile shorter but the climb is brutal and rocky. No matter which way you go up make sure to take the John Muir trail down. It’s a bit longer but it’s less steep, less rocky and way less dangerous. Your tired legs will thank you.
It’s a really tough hike
Brian and I began our climb at 8am and ended around 5:30pm. We’re strong hikers and this hike kicked our ass. At the end I felt the way I feel at the end of a marathon: Everything hurts and I don’t want to take another step. Make sure to give yourself plenty of time to reach the top and make it back down before sunset. We met hikers who began their hike up at 3:30am.
Reward yourself with a shower
There’s only one shower facility in all of Yosemite National Park and luckily it’s right by the Half Dome trailhead. Once you’re done with your climb make sure to stop by the Curry Village Housekeeping Camp for a shower. They cost $5 but they’re worth every penny.
This trip was originally published on So Many Places.